DIY Grow Tunnel: The Ultimate Guide to Extending Your Growing Season
A DIY grow tunnel is a game-changer for gardening enthusiasts looking to protect their plants and extend their growing season. Whether you’re nurturing tender seedlings in early spring, shielding crops from harsh winter frost, or protecting delicate plants from pests, a grow tunnel is a versatile and cost-effective solution. With the right materials and a little effort, you can create a customized tunnel that boosts your garden’s productivity while saving you money.
In this guide, we’ll explore how to build your own DIY grow tunnel step by step, the benefits of using one, and tips for choosing the best materials. From fresh vegetables to vibrant flowers, your garden can thrive year-round with this simple yet powerful tool. Ready to take your gardening to the next level? Let’s dig in
Understanding Grow Tunnels
What is a Grow Tunnel?
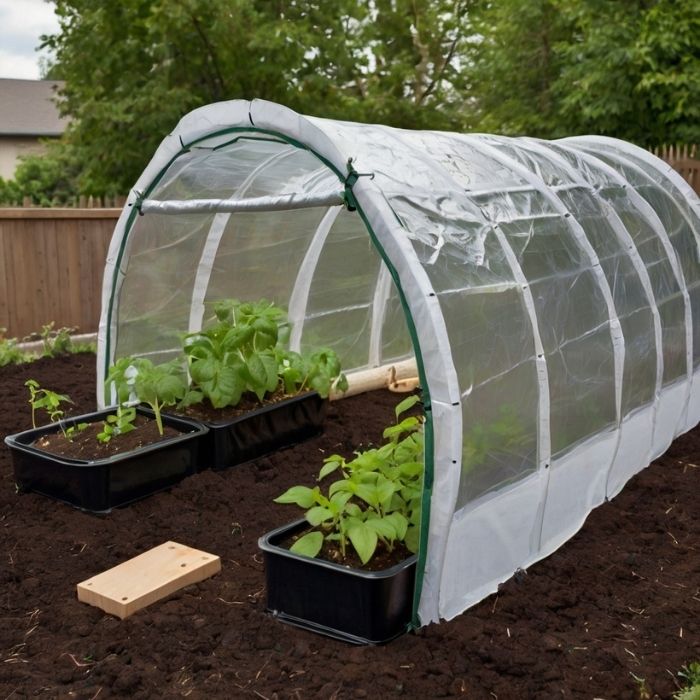
A grow tunnel, also known as a low tunnel or hoop house, is a structure that provides protection for plants from cold temperatures and pests. Essentially, it consists of hoops covered with plastic or fabric that create a microclimate. As a result, this allows for earlier planting in spring and extended growing into fall.
Benefits of Using Grow Tunnels
Using grow tunnels comes with numerous advantages. For instance:
- Temperature Regulation: They keep plants warmer during cooler nights.
- Pest Control: Additionally, they shield plants from insects and larger pests.
- Moisture Management: Furthermore, they reduce water loss through evaporation.
- Extended Growing Season: Ultimately, they allow for earlier planting and later harvesting.
Materials Needed
Before starting your project, it is crucial to gather the following materials:
- PVC or EMT conduit pipes (1/2 inch diameter)
- Rebar stakes (24 inches long)
- Plastic sheeting or row cover fabric
- Rope or bungee cords
- Clamps or clips to secure the cover
- Tools: Saw, hammer, measuring tape, and drill
Step-by-Step Instructions
Step 1: Planning Your Tunnel
First, choose your location carefully. Select a sunny area in your garden that provides good drainage. Next, determine the dimensions of your tunnel; a standard low tunnel can cover an area of about 9 feet by 4 feet. However, feel free to adjust based on your garden’s size.
Step 2: Preparing the Garden Bed
Prepare the garden bed by clearing any debris and leveling the soil. Additionally, adding compost can enhance soil fertility and structure.
Step 3: Cutting the Pipes
Now it’s time to cut your PVC or EMT conduit pipes into lengths suitable for the height of your tunnel. Typically, each hoop should be about 4 to 5 feet tall when inserted into the ground.
Step 4: Installing the Hoops
- Pound Rebar Stakes: Start by driving rebar stakes into the ground at intervals of about 2 feet apart along the length of where your tunnel will be.
- Attach Hoops: Then, slip the ends of the cut pipes over the rebar stakes to create arches. Ensure they are secure and evenly spaced.
Step 5: Covering the Tunnel
- Drape Plastic Sheeting: Next, cover the hoops with plastic sheeting or row cover fabric. Make sure it extends down to the ground on both sides to create a sealed environment.
- Secure the Cover: Use clamps or clips to hold the cover in place against wind. If necessary, weigh down the edges with stones or soil.
Step 6: Ventilation and Access
To maintain proper ventilation, create openings on both ends of the tunnel that can be rolled up or secured with ties. Moreover, monitor temperature inside the tunnel regularly—especially on sunny days—to prevent overheating.
Step 7: Maintenance and Care
Regularly check for any signs of pests or diseases within your grow tunnel. Additionally, adjust coverings as needed based on weather conditions (e.g., removing covers during warmer days).
Tips for Success
To ensure optimal results with your grow tunnel:
- Use UV-resistant plastic to guarantee durability against sunlight.
- Consider adding shade cloth during peak summer months to prevent overheating.
- Rotate crops each season to maintain soil health and reduce pest buildup.
Conclusion
In conclusion, building a DIY grow tunnel is not only a rewarding project but also enhances your gardening capabilities significantly. With minimal investment in materials and time, you can create an effective structure that protects your plants while extending your growing season. Whether you’re a novice gardener or an experienced horticulturist, this simple yet effective solution can lead to healthier plants and bountiful harvests. So go ahead—embrace this opportunity for better gardening! Happy gardening! This revision includes more transition words throughout the text to enhance flow and coherence while maintaining clarity and engagement. If you have any further adjustments in mind or additional requests, feel free to let me know!