How to Grow Shasta Daisy from Seeds: A Comprehensive Guide
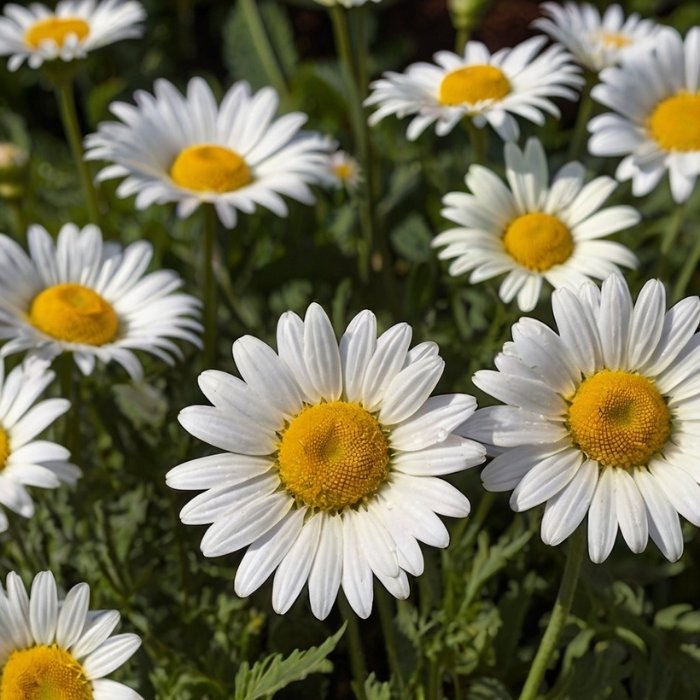
Shasta daisies (Leucanthemum x superbum) are beloved for their cheerful white petals and golden-yellow centers, which bring classic charm to gardens. Growing these perennials from seeds can be a cost-effective and rewarding endeavor. In this guide, we provide a step-by-step approach to successfully cultivating Shasta daisies from seeds, ensuring you achieve vibrant, healthy blooms.
Why Grow Shasta Daisies from Seeds?
Growing Shasta daisies from seeds allows gardeners to enjoy the satisfaction of nurturing plants from the very beginning. It is an economical option, especially if you are looking to fill a large area with blooms. Additionally, growing from seeds provides access to a variety of cultivars, enabling you to choose unique colors, sizes, and growth habits to suit your landscape.
Choosing the Right Shasta Daisy Seeds
Before you start, it is crucial to select high-quality seeds for optimal results. Look for the following characteristics:
- Freshness: Choose seeds from a reputable supplier, ensuring they are within the recommended viability period.
- Variety: Popular varieties include ‘Becky,’ which is known for its sturdy stems, and ‘Snowcap,’ a dwarf cultivar ideal for compact spaces.
- Organic Options: If you prefer sustainable gardening practices, opt for certified organic seeds.
When to Plant Shasta Daisy Seeds
Timing is key to successfully growing Shasta daisies. Seeds can be planted either indoors or directly in the garden:
- Indoor Planting: Start seeds indoors 6-8 weeks before the last expected frost in your area. This method gives seedlings a head start, particularly in regions with shorter growing seasons.
- Outdoor Sowing: Sow seeds directly in the garden after the danger of frost has passed. Late spring or early summer is ideal.
Preparing the Soil for Shasta Daisies
Shasta daisies thrive in well-draining soil with a neutral to slightly acidic pH (6.0 to 7.0). Follow these steps for soil preparation:
- Choose a Sunny Spot: Daisies require full sun, receiving at least 6 hours of sunlight daily.
- Amend the Soil: Incorporate compost or well-rotted manure to enrich the soil with nutrients.
- Ensure Drainage: Avoid areas prone to waterlogging, as overly wet conditions can cause root rot.
Planting Shasta Daisy Seeds Indoors
For gardeners starting seeds indoors, follow these steps:
- Select Containers: Use seed trays or small pots with drainage holes.
- Fill with Seed-Starting Mix: Use a light, well-draining medium designed specifically for seed germination.
- Sow the Seeds: Place seeds on the surface of the soil and lightly press them down. Do not bury them deeply, as they need light to germinate.
- Moisten the Soil: Use a spray bottle to mist the soil gently. Avoid overwatering, as this can dislodge seeds.
- Provide Warmth and Light: Place containers in a warm location (65–75°F) with bright, indirect light or under grow lights.
Direct Sowing Shasta Daisy Seeds in the Garden
For outdoor planting, adhere to the following steps:
- Prepare the Bed: Remove weeds and loosen the topsoil with a rake.
- Scatter the Seeds: Sow seeds evenly on the prepared soil surface.
- Lightly Cover: Sprinkle a thin layer of fine soil over the seeds, just enough to anchor them.
- Water Gently: Use a watering can or hose with a fine spray attachment to moisten the area without washing away seeds.
Germination and Early Care
Shasta daisy seeds typically germinate within 10–20 days. During this period:
- Monitor Moisture: Keep the soil consistently moist but not waterlogged.
- Thin Seedlings: Once seedlings reach 2–3 inches tall, thin them to ensure adequate spacing (12–18 inches apart).
- Protect Young Plants: If growing outdoors, cover seedlings with row covers to shield them from pests and harsh weather.
Transplanting Shasta Daisies
If you started seeds indoors, transplant them into the garden once they have 3–4 sets of true leaves and the risk of frost has passed.
- Harden Off Plants: Gradually acclimate seedlings to outdoor conditions by placing them outside for a few hours each day for 7–10 days.
- Prepare Planting Holes: Dig holes slightly larger than the root ball and space them 12–18 inches apart.
- Plant and Water: Place seedlings in the holes, backfill with soil, and water thoroughly.
Caring for Established Shasta Daisies
To ensure lush growth and abundant blooms, follow these care tips:
- Watering: Provide 1 inch of water weekly, either through rainfall or irrigation.
- Fertilizing: Apply a balanced, slow-release fertilizer in early spring. Avoid over-fertilizing, as this can lead to leggy growth.
- Deadheading: Remove spent flowers regularly to encourage continuous blooming.
- Pruning: Cut plants back to the ground in late fall to prepare them for dormancy.
Common Pests and Diseases
Shasta daisies are relatively low-maintenance but can occasionally encounter pests and diseases.
- Aphids: These small, sap-sucking insects can be controlled with insecticidal soap or neem oil.
- Powdery Mildew: Prevent fungal issues by ensuring proper air circulation and avoiding overhead watering.
- Slugs and Snails: Use barriers or organic baits to protect young plants from these pests.
Enjoying Your Shasta Daisies
By following these steps, you can grow a thriving patch of Shasta daisies that will bloom year after year. These hardy perennials are perfect for borders, flower beds, and cutting gardens, bringing beauty and joy to any landscape.

